Ink for Godot
Wait, Ink for Godot? Is that possible? Yes it is - with Godot Ink and InkGD.
Getting Started with Godot Ink
Godot Ink is an addon that contains an Ink player for Godot .NET. It’s important to note that its dependency on .NET/C# means that it may not work in some development environments and platforms. For those situations, InkGD is the alternative to adopt. Please consult the documentation to see if Godot Ink is right for your projects.
Godot Ink for Godot 4
You’ll need to have Godot 4 Mono and Visual Studio ready to go.
Grab Godot Ink from the GitHub releases and unzip the addons folder within, into your project root.
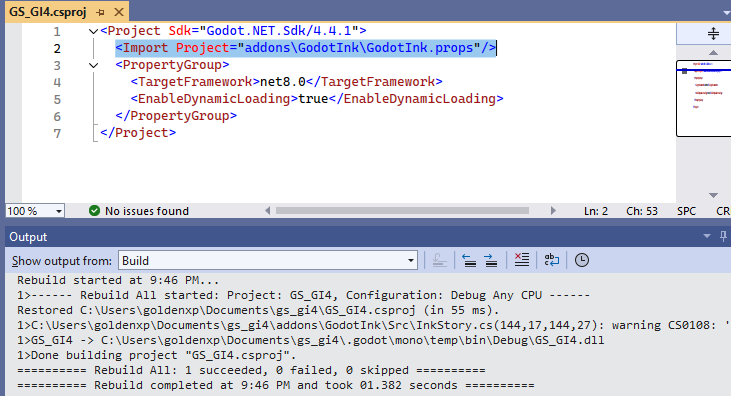
Once in the project, generate a C# solution using Projects > Tools > C# > Create C# Solution. This should make a .csproj file; edit this and add <Import Project="addons\GodotInk\GodotInk.props"/> right after the root Project tag. Open the C# solution and run Build > Build Solution. You will now be able to activate the plugin in Godot.
Back in Godot, jump to Project > Project Settings and under the Plugins tab, enable the ink plugin.
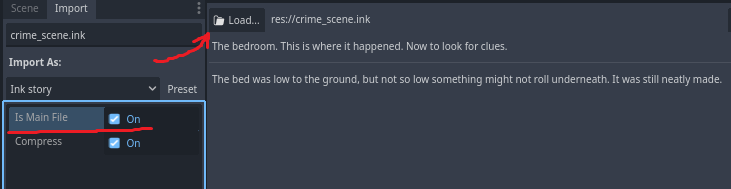
Add your desired ink file to the project. Select the file in the FileSystem tab in Godot, and then use the Import tab to turn on Is Main File and re-import it. Now you can use the Ink preview tab to examine your story.
To use this for a game, make a new scene and attach a C# script to a desired node. Open this in Visual Studio and export an InkStory variable so we can attach our ink file to it in Godot. Be sure to build your solution to spread these changes.
Attaching an ink file to the InkStory won’t do much so we’ll modify our script to print out the story contents and choices to the Output log.
using Godot;
using GodotInk;

public partial class Node2d : Node2D
{
	[Export]
	InkStory inkStory;

	public override void _Ready()
	{
		ContinueStory();
	}

	public void ContinueStory()
	{
		GD.Print(inkStory.ContinueMaximally());
		if (inkStory.CurrentChoices.Count > 0)
		{
			foreach (var choice in inkStory.CurrentChoices)
			{
				GD.Print(choice.Text);
			}
			inkStory.ChooseChoiceIndex(0);
			ContinueStory();
		}
	}
}
Building off this principle, it’s possible to build UI elements that can display and drive the InkStory.
Godot Ink for Godot 3
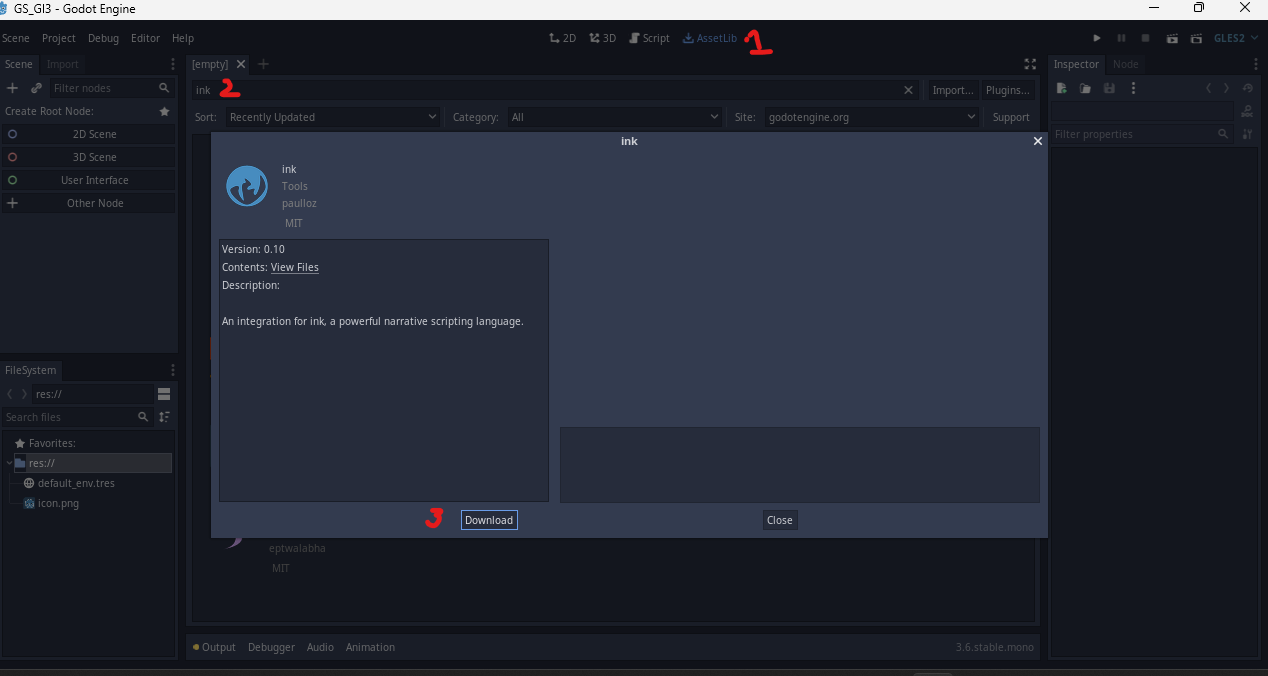
Since it is older, there is some variance with using Godot Ink in Godot Engine 3. For one, it can be installed with the AssetLib.
Once installed, generate its C# solution and open it. Right-click Dependencies in the Solution Explorer and Add Project Reference. You want to Browse and select ink-engine-runtime.dll and a specific version at that for compatibility reasons. Grab inklecate from GitHub and extract its contents to your project root. Point to the runtime DLL to complete this step. Notice the version number says 0.9.0. More on this shortly!

At this point, you can build the solution without errors. Jump back to Godot’s Project Settings’ Plugin tab and enable the plugin. Restart the editor.
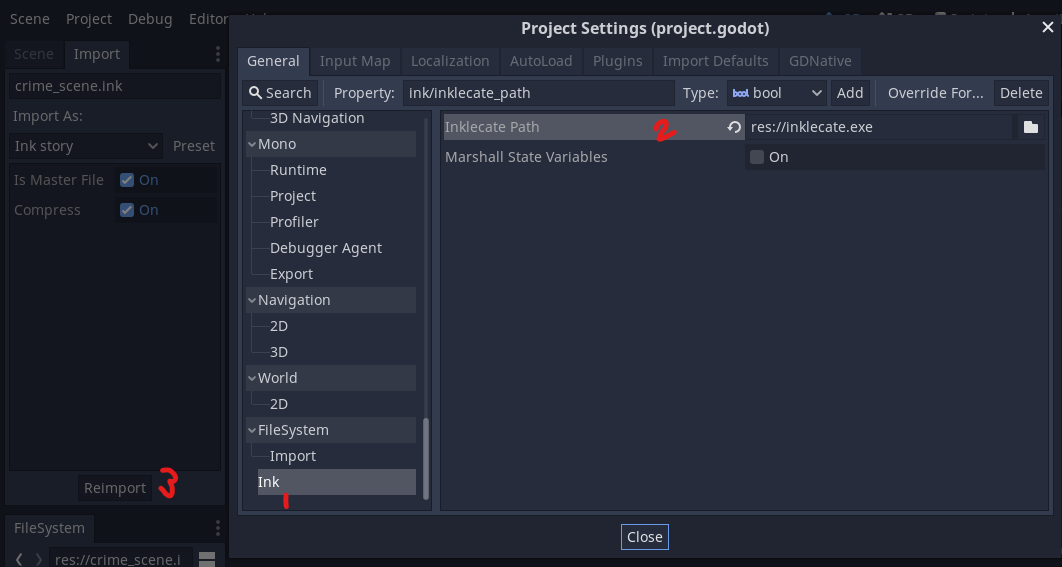
Considering the version number, this means you need to work with a specific version of Inky. Otherwise you could get Ink version errors. Fortunately, there’s a nice way of ensuring your Ink data matches the Ink runtime. You can simply export the JSON files within Godot using the inklecate version you just extracted. Under Project Settings, scroll down till you see Ink and point the path to where you extracted inklecate earlier.
Now you can re-import your Ink file and it will regenerate your JSON data. You can use the Ink preview panel to verify your ink JSON data runs.
Keep in mind that newer Ink language features may not be supported and could lead to errors.
To run your Ink in a game, you will need to use the InkPlayer node that’s been built. Make a new 2D Scene and add an InkPlayer node to your root node. Turn on Auto Load Story and set its Story to your desired Ink JSON file. Add a new C# script to the root so we can start using it. Here’s some rudimentary code that will use the InkPlayer to output the contents and choices to the log.
using Godot;

public class MyNode2D : Node2D
{
	InkPlayer inkPlayer;

	public override void _Ready()
	{
		inkPlayer = GetNode<InkPlayer>("InkPlayer");
		ContinueStory();
	}

	public void ContinueStory()
	{
		while (inkPlayer.CanContinue)
			GD.Print(inkPlayer.Continue());

		if (inkPlayer.CurrentChoices.Length > 0)
		{
			foreach (var choice in inkPlayer.CurrentChoices)
			{
				GD.Print(choice);
			}
			inkPlayer.ChooseChoiceIndex(0);
			ContinueStory();
		}
	}
}
As you can see, the pattern is similar to GodotInk in Godot 4 but some code changes are necessary on account of different implementations.
Getting Started with InkGD
InkGD is a GDScript implementation of an Ink player meaning that it will work with standard versions of Godot. It also has comprehensive documentation that can be found here. The price of its ubiquity is performance; it is slower to play Ink data with GDScript but depending on the scope or scale, it may not be a problem i.e. it won’t be noticeable to end users.
InkGD in Godot 3
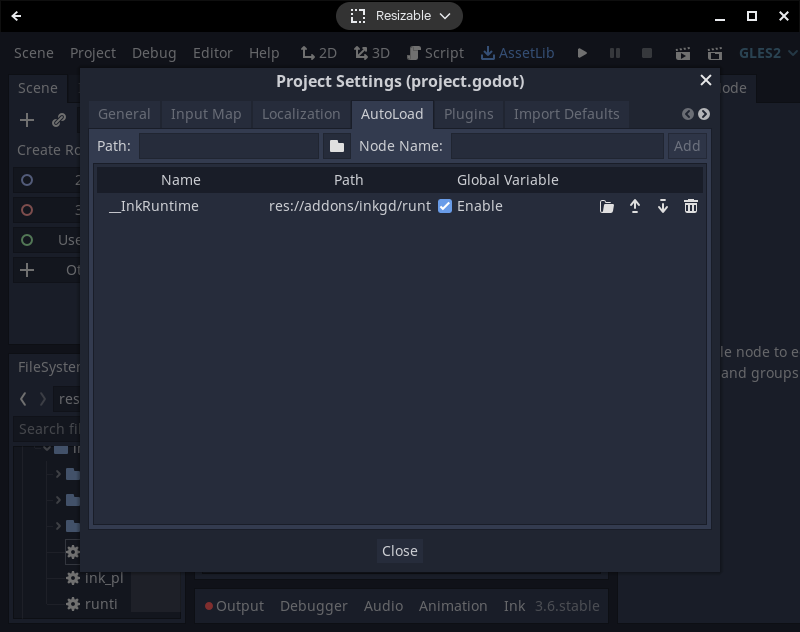
InkGD can be found and installed via GodotEngine’s AssetLib. Search for inkgd and follow the Asset Installer steps. Once installed, you should see the addon and its examples in the FileSystem tab. Next up, enable the editor plugin; go to Project > Project Settings and jump to the Plugins tab. Under the Status column, click the Enable check box for the InkGD row. This will also ensure the __InkRuntime is available. You can confirm this by checking the Autoload tab.
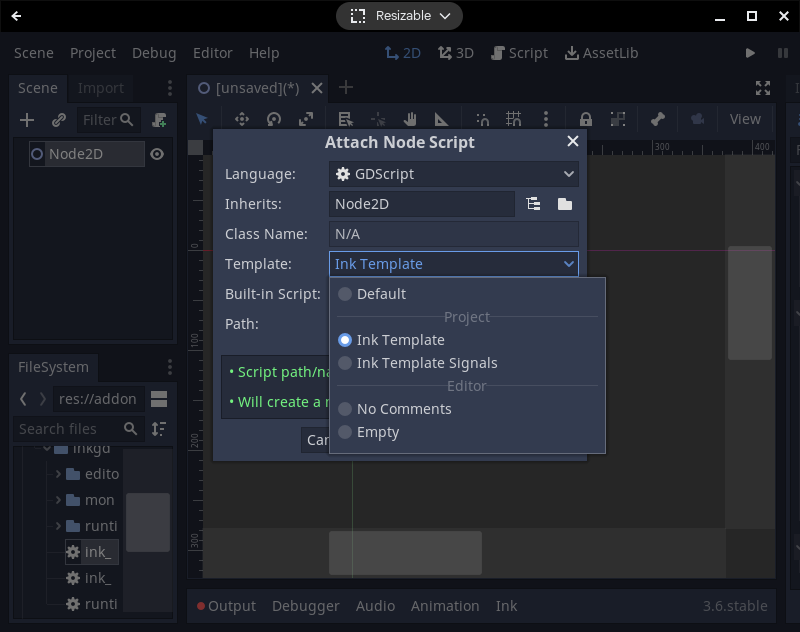
Working with InkGD’s Ink player is straightforward. Create a new scene; pick 2D Scene as the root node. Click the Attach Script button. There are two script templates at our disposal, one uses a while loop while the other relies on signals. For complex projects, the latter is recommended. For learning purposes, we will use the former which is simply Ink Template in the dropdown.
In the _ready function, replace the ink_file path to your desired json file that you exported from Inky or grab one of the examples.

You can save the scene, ensure it’s the main one and hit play and you should see the Ink script play out in the Output panel.
InkGD in Godot 4
If you were to try the above steps in Godot Engine 4, you’d see that InkGD is not available in AssetLib yet. Indeed, while InkGD works in Godot 4, it’s not as smooth as using it in Godot 3, something that could change in the future.
Currently, you need to grab InkGD for Godot 4 from GitHub and import it into your project via AssetLib instead. Go to the Godot 4 branch and click the green Code button and Download Zip. Back in Godot’s AssetLib, click Import and pick the zip file.
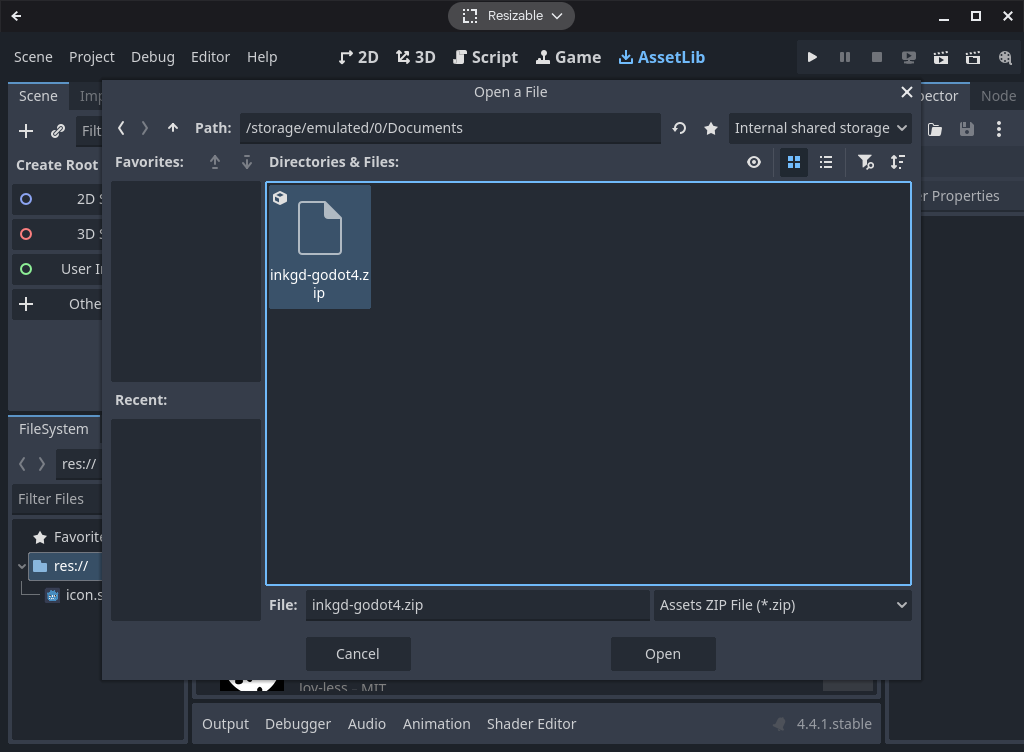
In the dialog box that says “Configure Asset Before Installing,” check on “Ignore asset root” and this will ensure the zipped contents are imported and not the folder itself. The scripts store absolute paths that we want to preserve in order to avoid errors.
If you’re using a version of Godot that does not have this checkbox, import it anyway, ignore the errors, and move the contents manually.
At this point, enable the plugin. An Ink panel should show up; use its Preview tab to try and preview an example ink json file. If it works with no issues, great, you can move on to using the Ink Player. However, if you see an error like 'ink_file' doesn't have the appropriate resource type.Are you sure you imported a JSON file? in the Output panel, close Godot and re-open your project. This fixes the import plugins. Confirm that the Preview panel can play your Ink JSON script.
In a new 2D scene, add an InkPlayer node to the root Node2D. In the Inspector, set the InkPlayer’s Ink File to your desired Ink JSON. Now attach a script to the root Node2D; unfortunately the templates don’t work just yet so we need to write a script from scratch. The steps involve grabbing the InkPlayer, loading its story and playing out its content and choices.
extends Node2D

@onready var _ink_player = $InkPlayer

func _ready() -> void:
	_ink_player.loaded.connect(_loaded)
	_ink_player.create_story()

func _loaded(successfully: bool):
	if successfully:
		_continue_story()

func _continue_story():
	print(_ink_player.continue_story_maximally())

	if _ink_player.has_choices:
		for choice in _ink_player.current_choices:
			print(choice.text)
		_ink_player.choose_choice_index(0)
		_continue_story()
Conclusion
Thanks to two open source projects, we can use Ink in Godot in multiple ways. The needs of your project will likely dictate which method you will adopt but it’s worth considering the trade-offs between accessibility and performance.