Getting Started with Inkpot in Unreal
Learn how to get up and running with Inkpot for the Unreal Engine.
Setting up the Plugin
In the following guide, we’ll assume the reader is proficient with Ink but not Unreal nor Inkpot.
To get started, ensure you have Unreal Engine installed through the Epic Games Launcher.
To use Inkpot, you will also need to install Visual Studio 2022 with specific workloads. See the official documentation for more details.
Find your engine in the Unreal Engine Library and click its Launch button. If it’s your first time launching Unreal, it might ask you to install some pre-requisites and enable some permissions. This is normal so accept all of it to ensure a smooth Unreal experience.
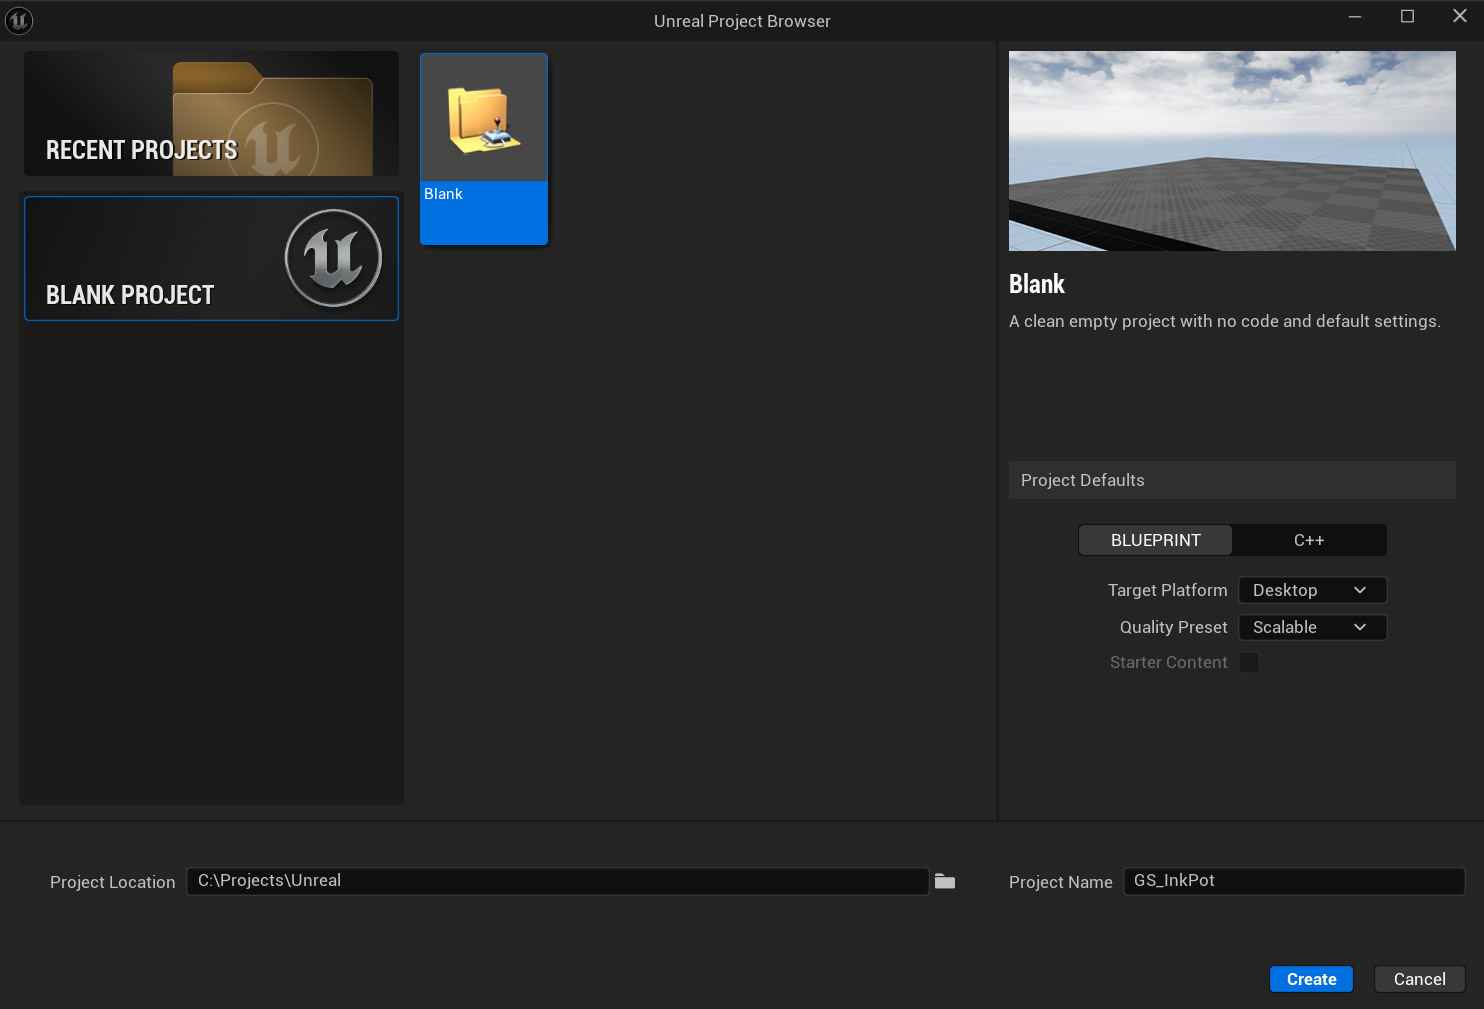
In the Unreal Project Browser, create a Blank Blueprint project. Give the project an appropriate name and set any other parameters as you wish. On creation, a simple level will be visible. We will now add the Inkpot plugin to this project.
You can get the plugin from Github. Download the archive; we will unzip it into the project folder.
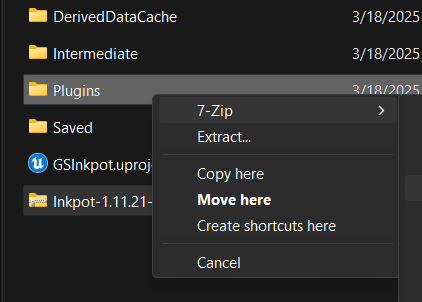
Using File Explorer, navigate to your project folder and create a new folder named Plugins. Extract the archive into that folder.
Re-open your project. You can do so quickly by opening the uproject file in the File Explorer. It will show a Missing Modules prompt.
The following modules are missing or built with a different engine version:

  Inkpot
  InkPlusPlus
  InkpotEditor

Would you like to rebuild them now?
Click Yes to start building the Inkpot plugin. Wait for the Unreal Editor build dialog to pop up; it could take longer than expected so best to be patient. You should see a new Binaries folder pop up as it does its thing.
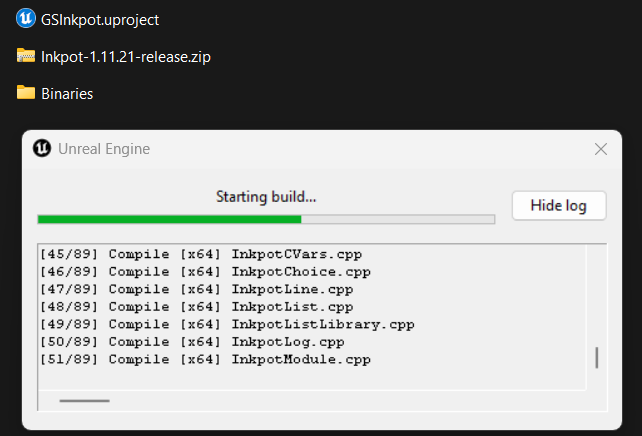
Should all go well, the Unreal Editor will open again and we’re now ready to enable Inkpot.
Unfortunately, there can be many points of failure here that are beyond the scope of this document; in case of errors, you will have to rely on troubleshooting elsewhere.
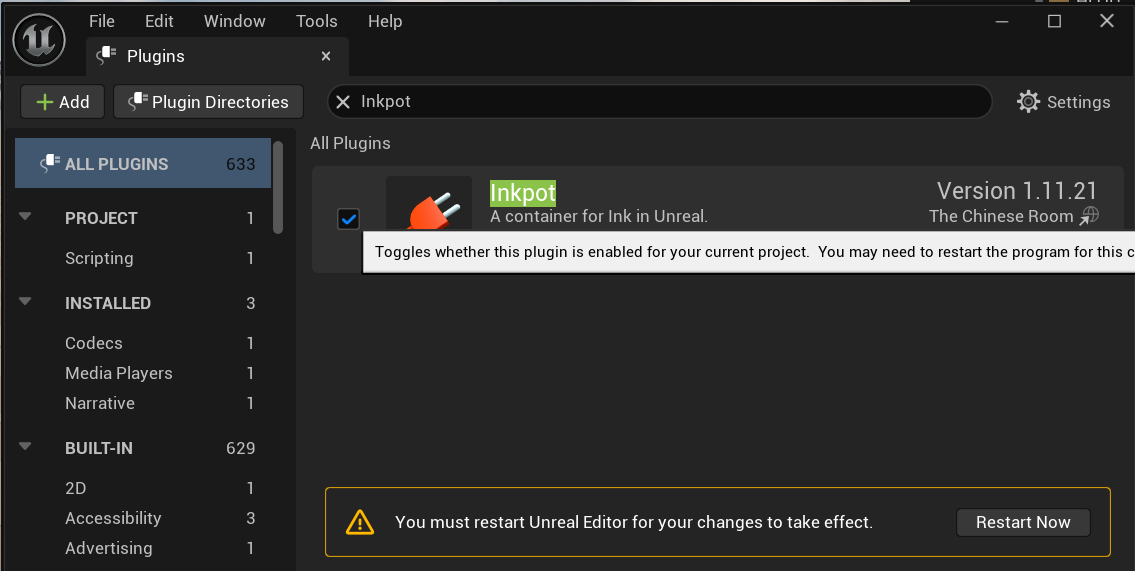
Go to Edit > Plugins to invoke the Plugins window where the plugins for the current project can be enabled or disabled. Use the Search filter to find Inkpot. Check it ON! It will prompt to restart the engine; go ahead and do so.
Starting your Ink story
Once you’re back in the engine, pull up the Content Drawer (typically on the bottom left) and click its Import button. Browse to and select an Ink file. This now exists in the project as an InkpotStoryAsset.
You might run into this error when doing the above step.
Inkpot: Error: CompileInkFile_Internal - C:/Users/goldenxp/path/TheIntercept.ink failed to compile ink. Error You must install or update .NET to run this application.
App: C:\Projects\Unreal\GSInkpot\Plugins\Inkpot-1.11.21-release\ThirdParty\InkCommandLine\inklecate.exe
Architecture: x64
Framework: 'Microsoft.NETCore.App', version '5.0.0' (x64)
.NET location: C:\Program Files\dotnet\
The following frameworks were found:
  6.0.14 at [C:\Program Files\dotnet\shared\Microsoft.NETCore.App]
  7.0.3 at [C:\Program Files\dotnet\shared\Microsoft.NETCore.App]
  8.0.5 at [C:\Program Files\dotnet\shared\Microsoft.NETCore.App]
Learn more:
https://aka.ms/dotnet/app-launch-failed
To install missing framework, download:
https://aka.ms/dotnet-core-applaunch?framework=Microsoft.NETCore.App&framework_version=5.0.0&arch=x64&rid=win-x64&os=win10
This happens because inklecate.exe bundled with Inkpot requires .NET 5.0 specifically. Fortunately, the remedy is suggested in the error! So grab the link to install the missing framework and add the .NET 5.0 runtime.
You won’t need to restart Unreal. Re-import your Ink file and you should see the Inkpot Story in your Content Browser.
I’m using the classic Intercept story for this guide. Of course, you can use any of your own!
In order to start our Ink story, we would use the Inkpot subsystem.
Subsystems in Unreal are classes with managed lifetimes. They are great for code organization and access. Think of it like a better Singleton.
Inkpot is an Engine Subsystem meaning its lifetime is shared with the Engine (as opposed to, for example, per-level with a World Subsystem).
To keep this exercise as simple as possible, let’s make a new Empty Level. Go to File > New Level and pick Empty Level. Click Create. We should now have an empty World. Let’s access its Level Blueprint.

Click the Blueprints icon in the Level Editor toolbar and pick Open Level Blueprint. This will open up the Blueprint Editor.
The Blueprint Editor is where we can connect nodes to instruct Unreal what to do as opposed to explicitly writing lines of code to do the same.
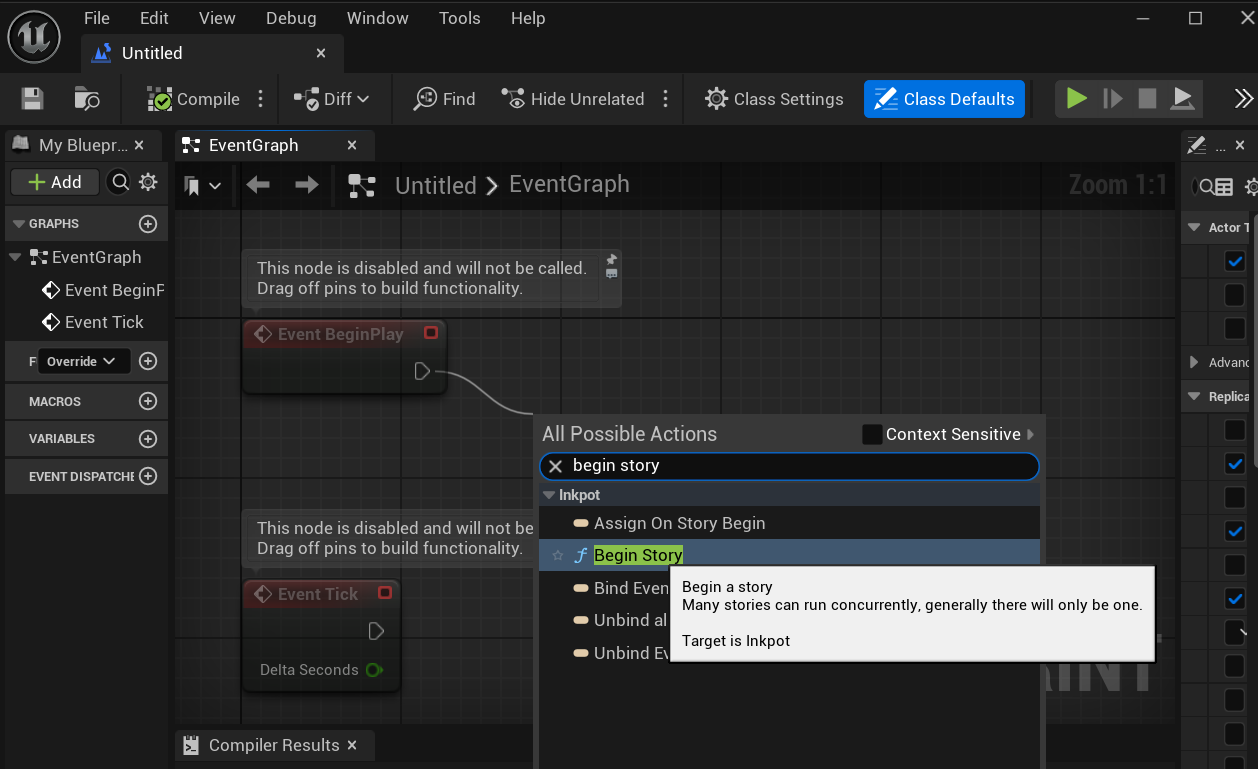
Drag out the white Exec arrow on the right side of the Event Begin Play node till you see Place a New Node and release to bring up the Action List. Type Begin Story; if the list is empty, un-check Context Sensitive. Pick the node and it will drop it in and connect it automatically to Event Begin Play.
We now need to provide the node with a Target Inkpot and an Inkpot Story asset. We have the latter since we imported it but for the former, we need to use the subsystem itself. Drag out the Target blue pin and add Get Inkpot to it. Then, set the node’s story asset to the one you imported.
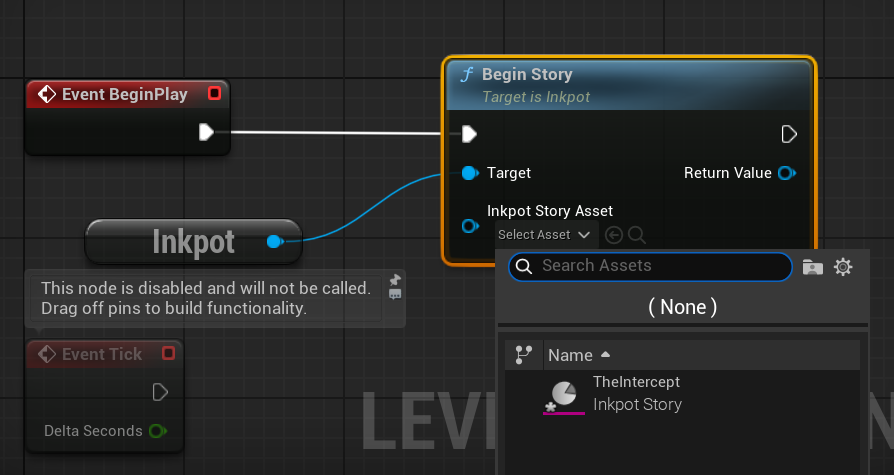
The Begin Story node will now start the story and also return an Inkpot Story object that we can use in different ways.
At this point, Save All via the File menu or use Ctrl + Shift + S.
Printing Ink Story Lines
Typically with Ink stories, we continue in order to fetch lines. When we cannot continue, it might mean we have a list of choices and need to choose one. We will do the same with our Inkpot story.
We’ll modify our blueprint to support the continue/choose procedure. To reduce lesson scope, we will not handle user input nor build user interfaces. We will make choices automatically and display text in the console with Print String nodes.
In our blueprint, we will add an event that will run whenever we continue our story.
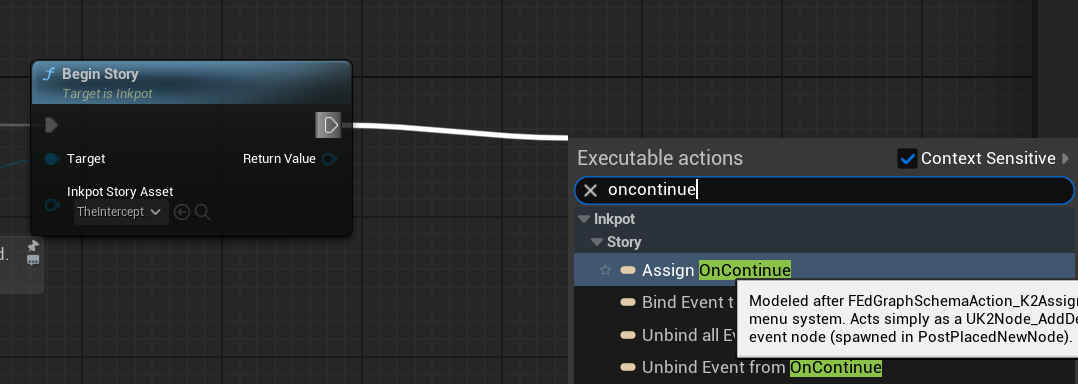
Drag out the right Exec pin of the Begin Story node and type in OnContinue and pick Assign OnContinue from the list. This will drop in a Bind Event to OnContinue node as well as a Custom Event node. You will be put in a rename mode where you can rename the event to whatever you please.
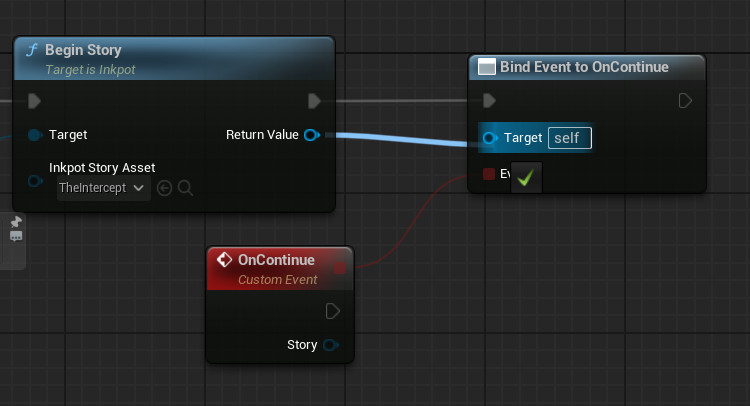
Connect the Return Value of Begin Story into the Target of the Bind Event to OnContinue node to ensure we register the event on our current story.
Now we’ll set up our event. Drag its Exec pin and type Print String and hit enter to drop said node. We’ll print the current line of the story, drag the event’s Story pin and type Get Current Line and add it. To use this node with the print node, we’ll need to fetch the string within the line. Drag out the Return Value pin of the Get Current Line node and type Get String and add it. Connect its Return Value into In String of the Print String node.
Save all. If you were to run the simulation at this point, nothing would occur because we actually have not performed a continue action yet!
Right after the Bind Event node, drop in and connect a Continue Maximally node.
Continue Maximally means to keep continuing until we reach a choice.
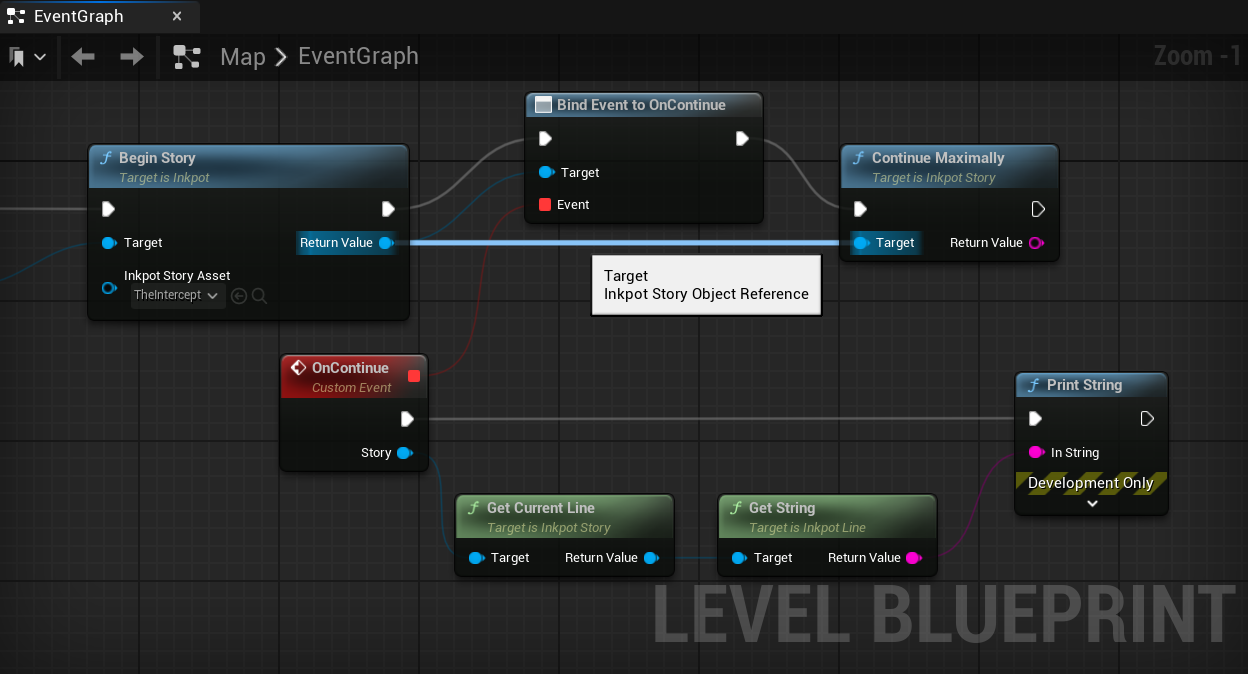
Save your work and hit the green Play button. You might see the first line of your Ink story flash on the viewport. You can also open the Output Log (next to the Content Drawer at the bottom of the default layout) and find the printed statements.
InkPlusPlus: FStory::FStory 0000066D02838710
Inkpot: Display: Flow         : DEFAULT_FLOW
Inkpot: Display: Text         : They are keeping me waiting.
Inkpot: Display: Variables    : forceful = 0
Inkpot: Display:              : evasive = 0
...
...
...
Inkpot: Display:              : longgrasshooperframe = false
Inkpot: Display:              : DEBUG = false
Inkpot: Display: Choice       : 0 - Hut 14
LogBlueprintUserMessages: [Map_C_1] They are keeping me waiting.
Inkpot itself logs a lot of useful information. But we’ll be focused mainly on LogBlueprintUserMessages since those are the ones we’re making in this lesson.
Working with Choices
We will print the choices next. Right after we print the current line, we’ll run a for-loop to fetch the choices from the story. Since we’ll be using the Inkpot Story object quite a bit, let’s promote it to a local variable for easy access and to avoid blueprint spaghetti.

Drag the Story pin of the event node and pick the Promote to variable option. Interject the Event and Print exec connection with the new SET node.
Right after the Print node, add a For Each Loop. Then, drag a new Story variable onto the graph. Pick Get Story and drag its Story pin to add a Get Current Choices node to it. Drag its Return Value into the Array of the loop node.
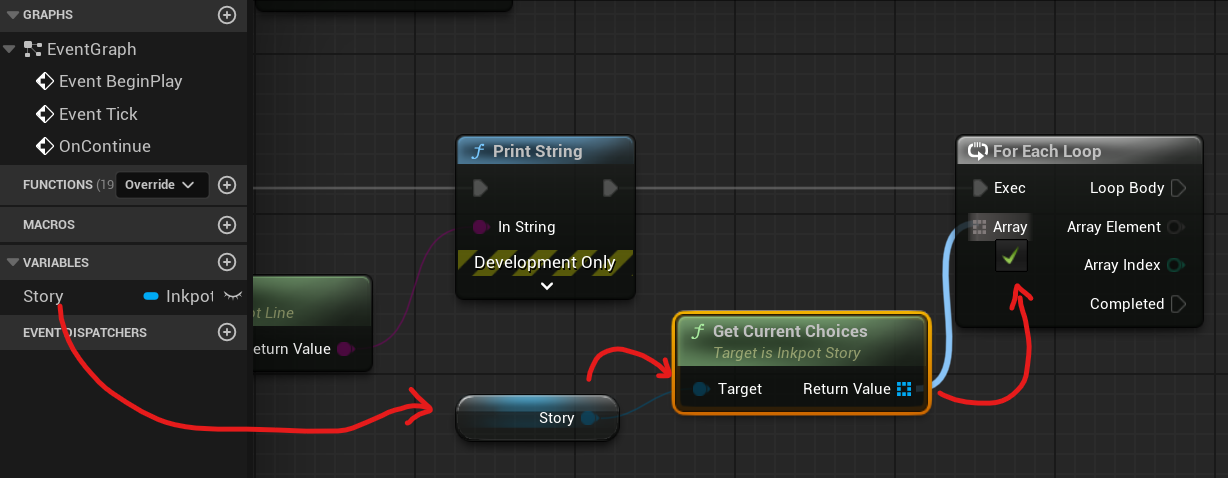
Every Inkpot Choice is also an Inkpot Line so to get its string, we can use another Get String node. Connect it to another Print String node and connect that to the Loop Body exec pin. Now, for every available Inkpot Choice, we will print its string.

The output now looks like
LogBlueprintUserMessages: [Map_C_2] They are keeping me waiting.
LogBlueprintUserMessages: [Map_C_2] Hut 14
Right after we print our choices, we’ll choose one. We’ll use a Delay node to ensure we don’t pick choices instantly.
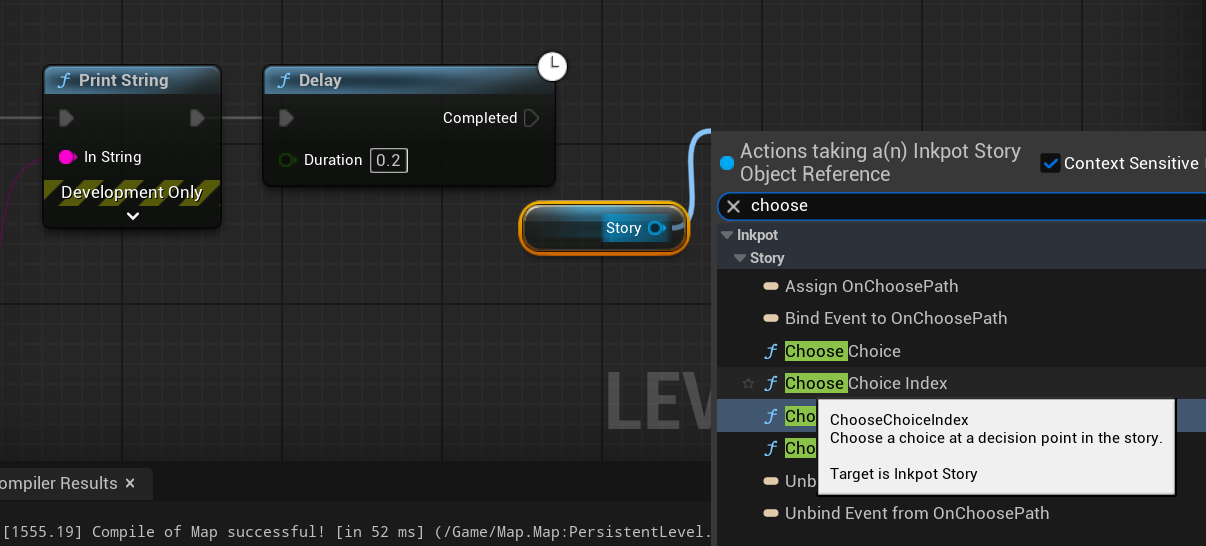
To make a choice, we’ll drop another Story variable, drag its pin to add a Choose Choice Index node. This lets us pick a choice with an integer, 0 being the first choice. Make sure it’s connected to the Delay node.
After making a choice, we’ll need to continue the story. So drop another Continue Maximally node after Choose Choice Index. Make sure to connect the Story variable to its Target pin.
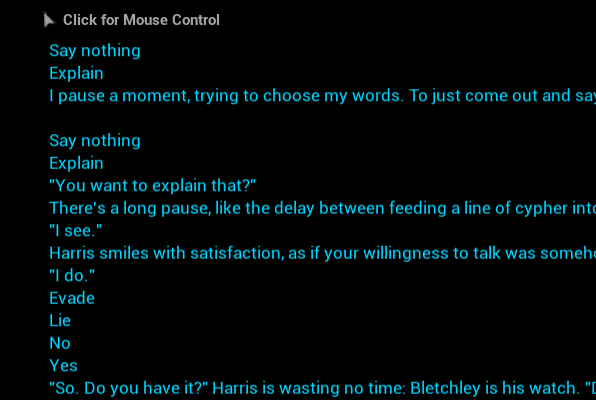
When you run the game, you should now see the Output Log spit out the Ink content. Right after a group of choices are displayed, the first choice will be selected and the story will continue till the end is reached.
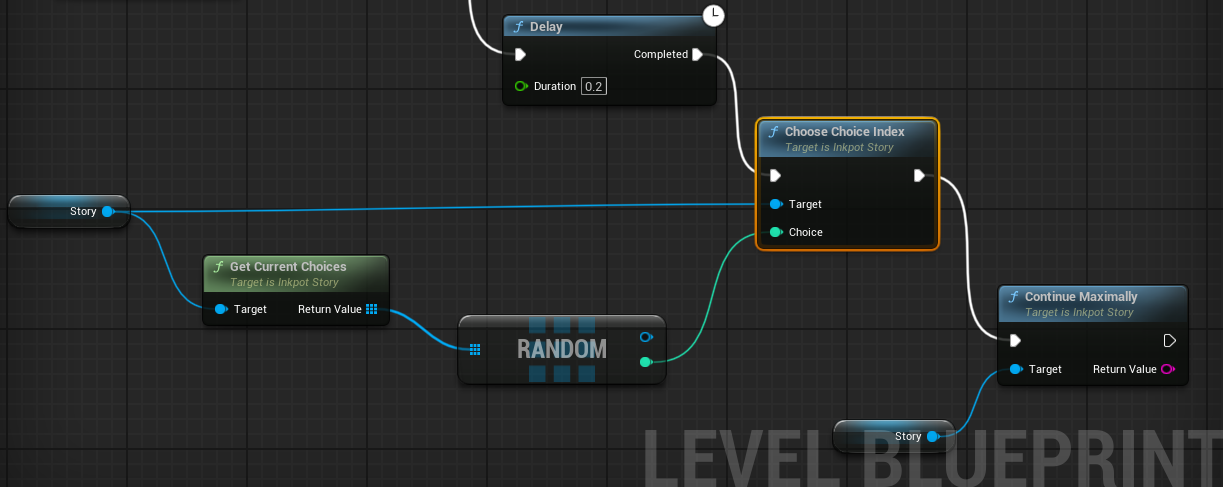
Of course, we don’t have to stick with selecting the first choice each time. We can pick a random index from the Choices array and use that.
Parting Words
And this concludes a basic primer on using Inkpot in Unreal. We’ve seen how we can setup the Inkpot subsystem to fetch our story content and make choices.